


How to measure solar radiation
Measuring solar radiation, the right way
So you want to measure solar radiation? This note will set you off on the right track to get your data flowing. Follow these step by step instructions to get accurate and reliable solar radiation data from your pyranometer.
Introduction to measuring solar radiation
So you want to measure solar radiation? You are not alone. People have been measuring the energy coming from the sun for centuries, and today more people are measuring solar radiation than ever before.
This note will walk you through the process, from choosing an instrument to getting your data in.
We discuss site selection, instrument mounting and datalogger setup. To ensure your solar radiation data remains reliable for years, we also cover quality control and maintenance.
What do you want to measure?
As with any measurement, start by asking yourself what it is that you want to measure. The term ‘solar radiation’ is used in many different applications, with slightly different meanings.
Solar radiation is often defined as the energy reaching the earth from the sun. A large part of this is visible sunlight, but the solar spectrum extends into the UV as well as the near infra-red.
It reaches us in different ways: directly from the sun (direct solar radiation), through scattering through the atmosphere (diffuse solar radiation) or via reflections. These quantities can be measured separately, but most of the times people are interested in the total radiation on the surface: the global horizontal irradiance.
In the monitoring of PV power plants, both the global horizontal irradiance as well as the irradiance in the plane of your panels is required. This is called tilted solar radiation, or ‘plane of array (POA)’ irradiance.
In energy balance studies, multiple pyranometers are combined to measure both the incoming and reflected solar radiation. This can be combined with separate measurements of net longwave radiation and other fluxes.
Instruments to measure solar radiation
Now that you know what to measure, it is time to select the right instrument.
The table in Box 1 lists the instruments that are used for the different quantities. When accuracy is important, consider using redundant instruments.
In conditions with dew and frost, a ventilation unit can greatly improve the dependability of your measurement.
| MEASURAND | INSTRUMENT |
| global horizontal irradiance | pyranometer¹ |
| solar radiation on a tilted plane | pyranometer |
| irradiance in the 'plane of array' | pyranometer |
| direct solar radiation | pyrheliometer on a solar tracker |
| diffuse solar radiation | pyranometer, shaded² |
| reflected solar radiation | pyranometer |
| albedo | 2 x pyranometer³ |
| surface energy balance | 2 x pyranometer + 2 x pyrgeometer⁴ ⁵ |
¹ Alternatively, you can use separate measurements of direct and diffuse solar radiation
to calculate global horizontal irradiance
² Shading the pyranometer can be done using a shadow ring or by mounting it on a solar tracker with a shading mechanism
³ Albedometers are available that integrate these measurements in one instrument
⁴ Net radiometers are available that integrate these measurements in one instrument
⁵ Sometimes combined with separate measurements of sensible heat flux,
latent heat flux and ground heat flux
Accuracy
Not all pyranometers are created equal: there are different models with various accuracies, outputs, features and price tags. To help the user, pyranometers are classified in different accuracy classes according to ISO 9060. Often, a certain application will demand a certain accuracy class.
The total measurement accuracy is determined by a number of factors, like location installation, the level of maintenance and the recalibration interval.
In case one of the links in the chain is weak, it makes no sense to strengthen the others. For example, in case there is no regular cleaning, a high class instrument will not measure accurately.
For further guidance, look at our pyranometer selection guide.
Location
The site where you will install your sensor is important: you want your measurement to be representative of the thing you are interested in. Pyranometers have a full hemispherical field of view: they see the complete sky. That means that ideally the area above the black sensor surface should be free of any obstruction. At the same time, the instrument should remain accessible. In practice, rooftops provide good locations to mount solar radiation sensors.
For your site, chart all obstructions (trees, buildings, poles, anything) throughout the full 360 ° around the pyranometer. Ideal sites have no obstructions in the field of view of the instruments that exceed an elevation of 5 °.
For your location, look up the trajectory of the sun through the sky during the year. There are several online resources available, for example from the University of Oregon http://solardat.uoregon.edu/SunChartProgram.html
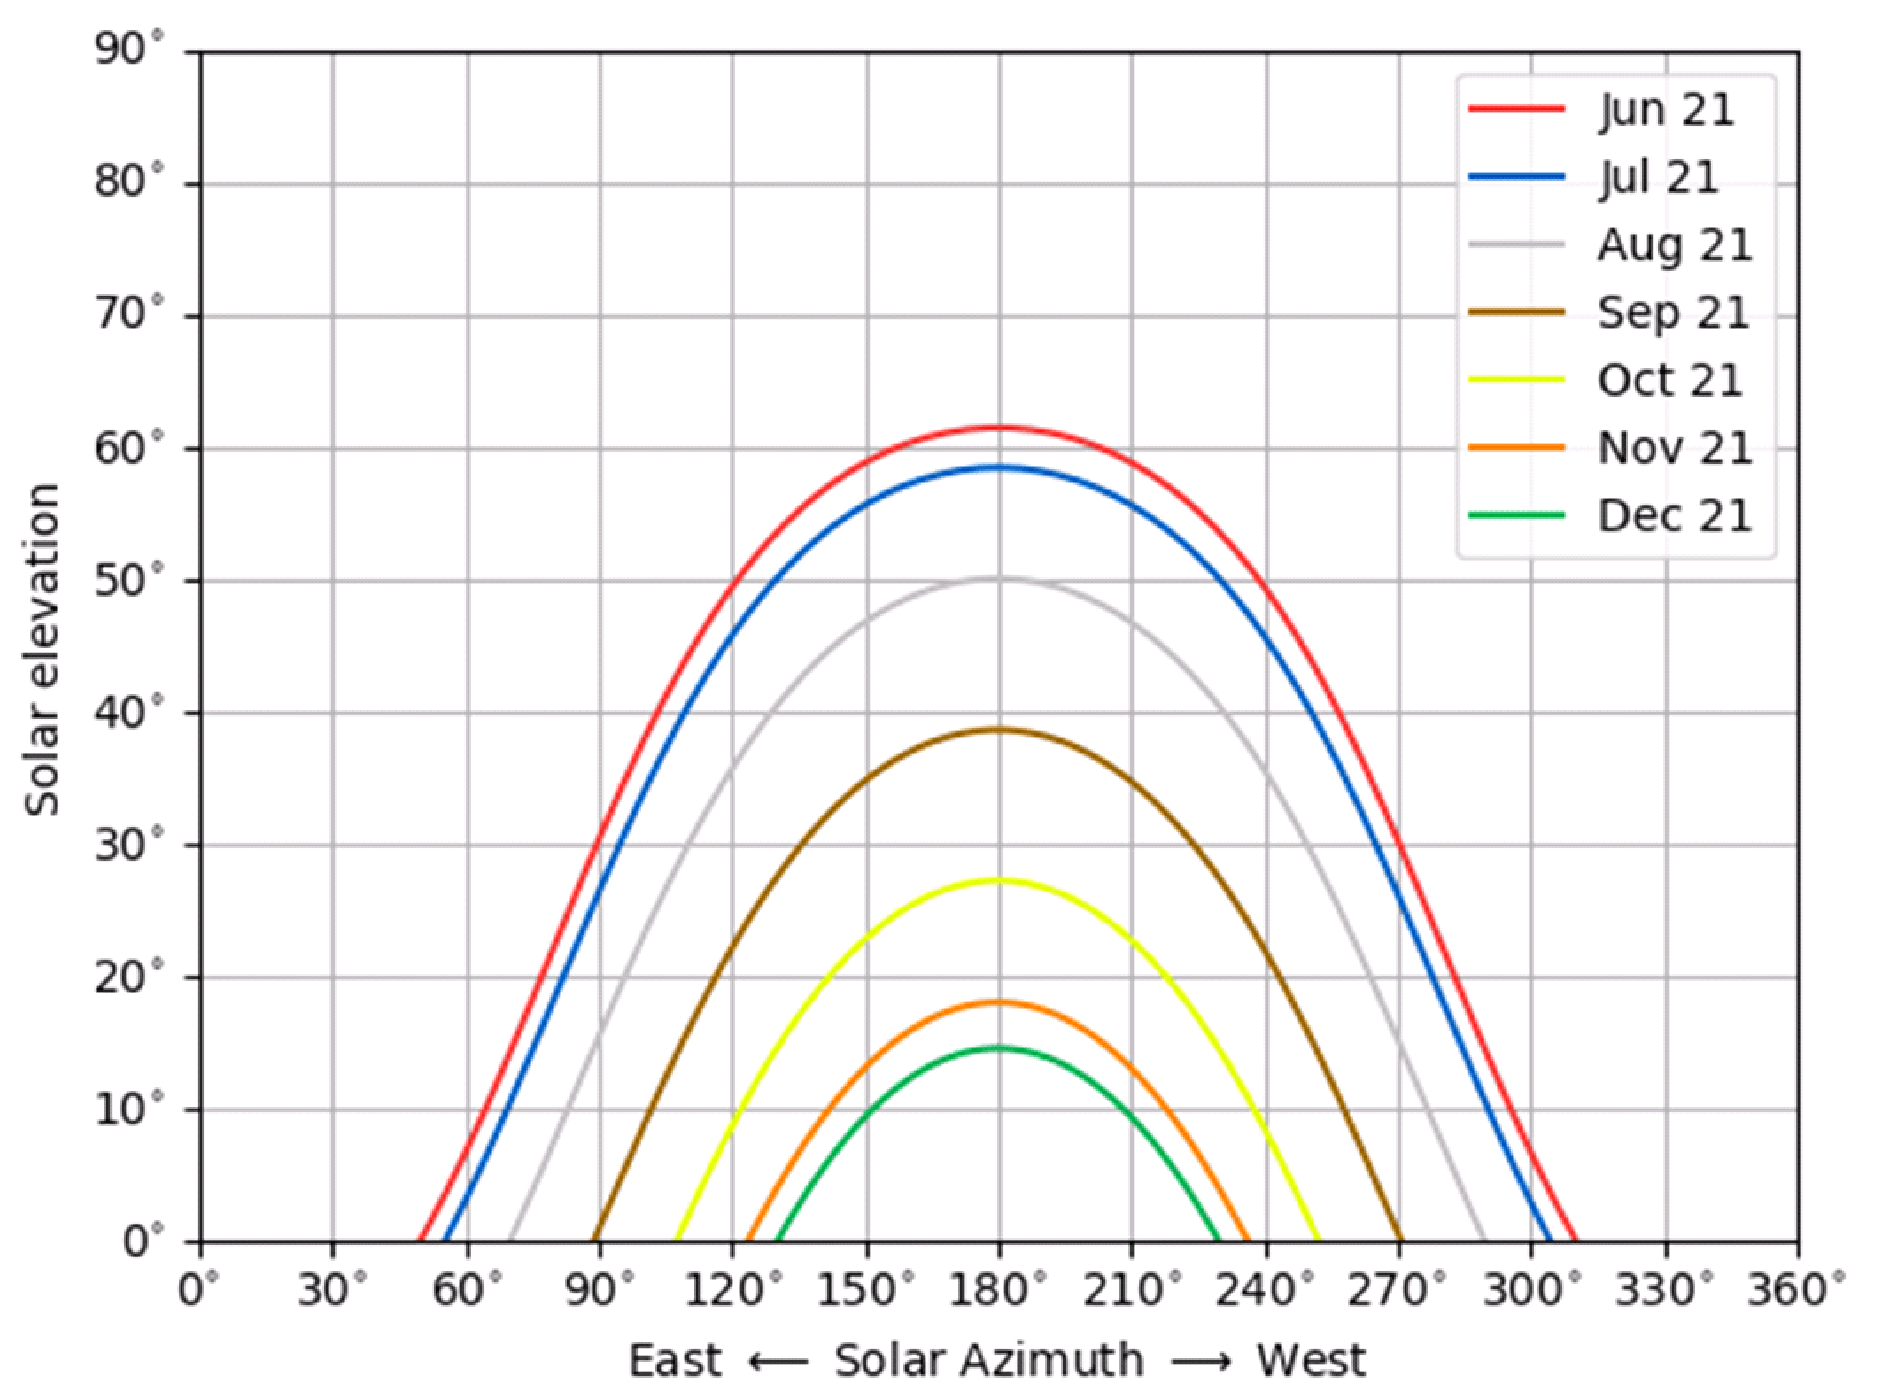
Try to avoid blocking of the direct beam at any time. Note periods where this is unavoidable.
Do not put pyranometers close to light-coloured walls or other reflective surfaces. Do not expose them to artificial radiation sources like lamps.
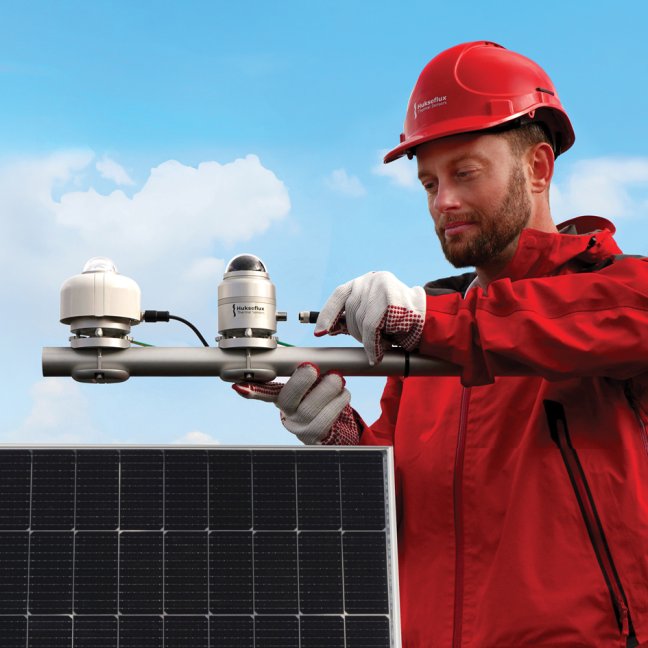
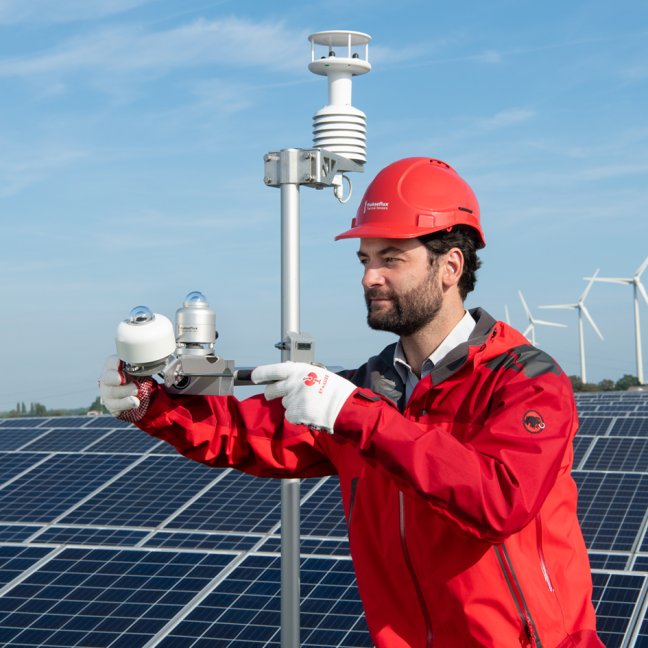
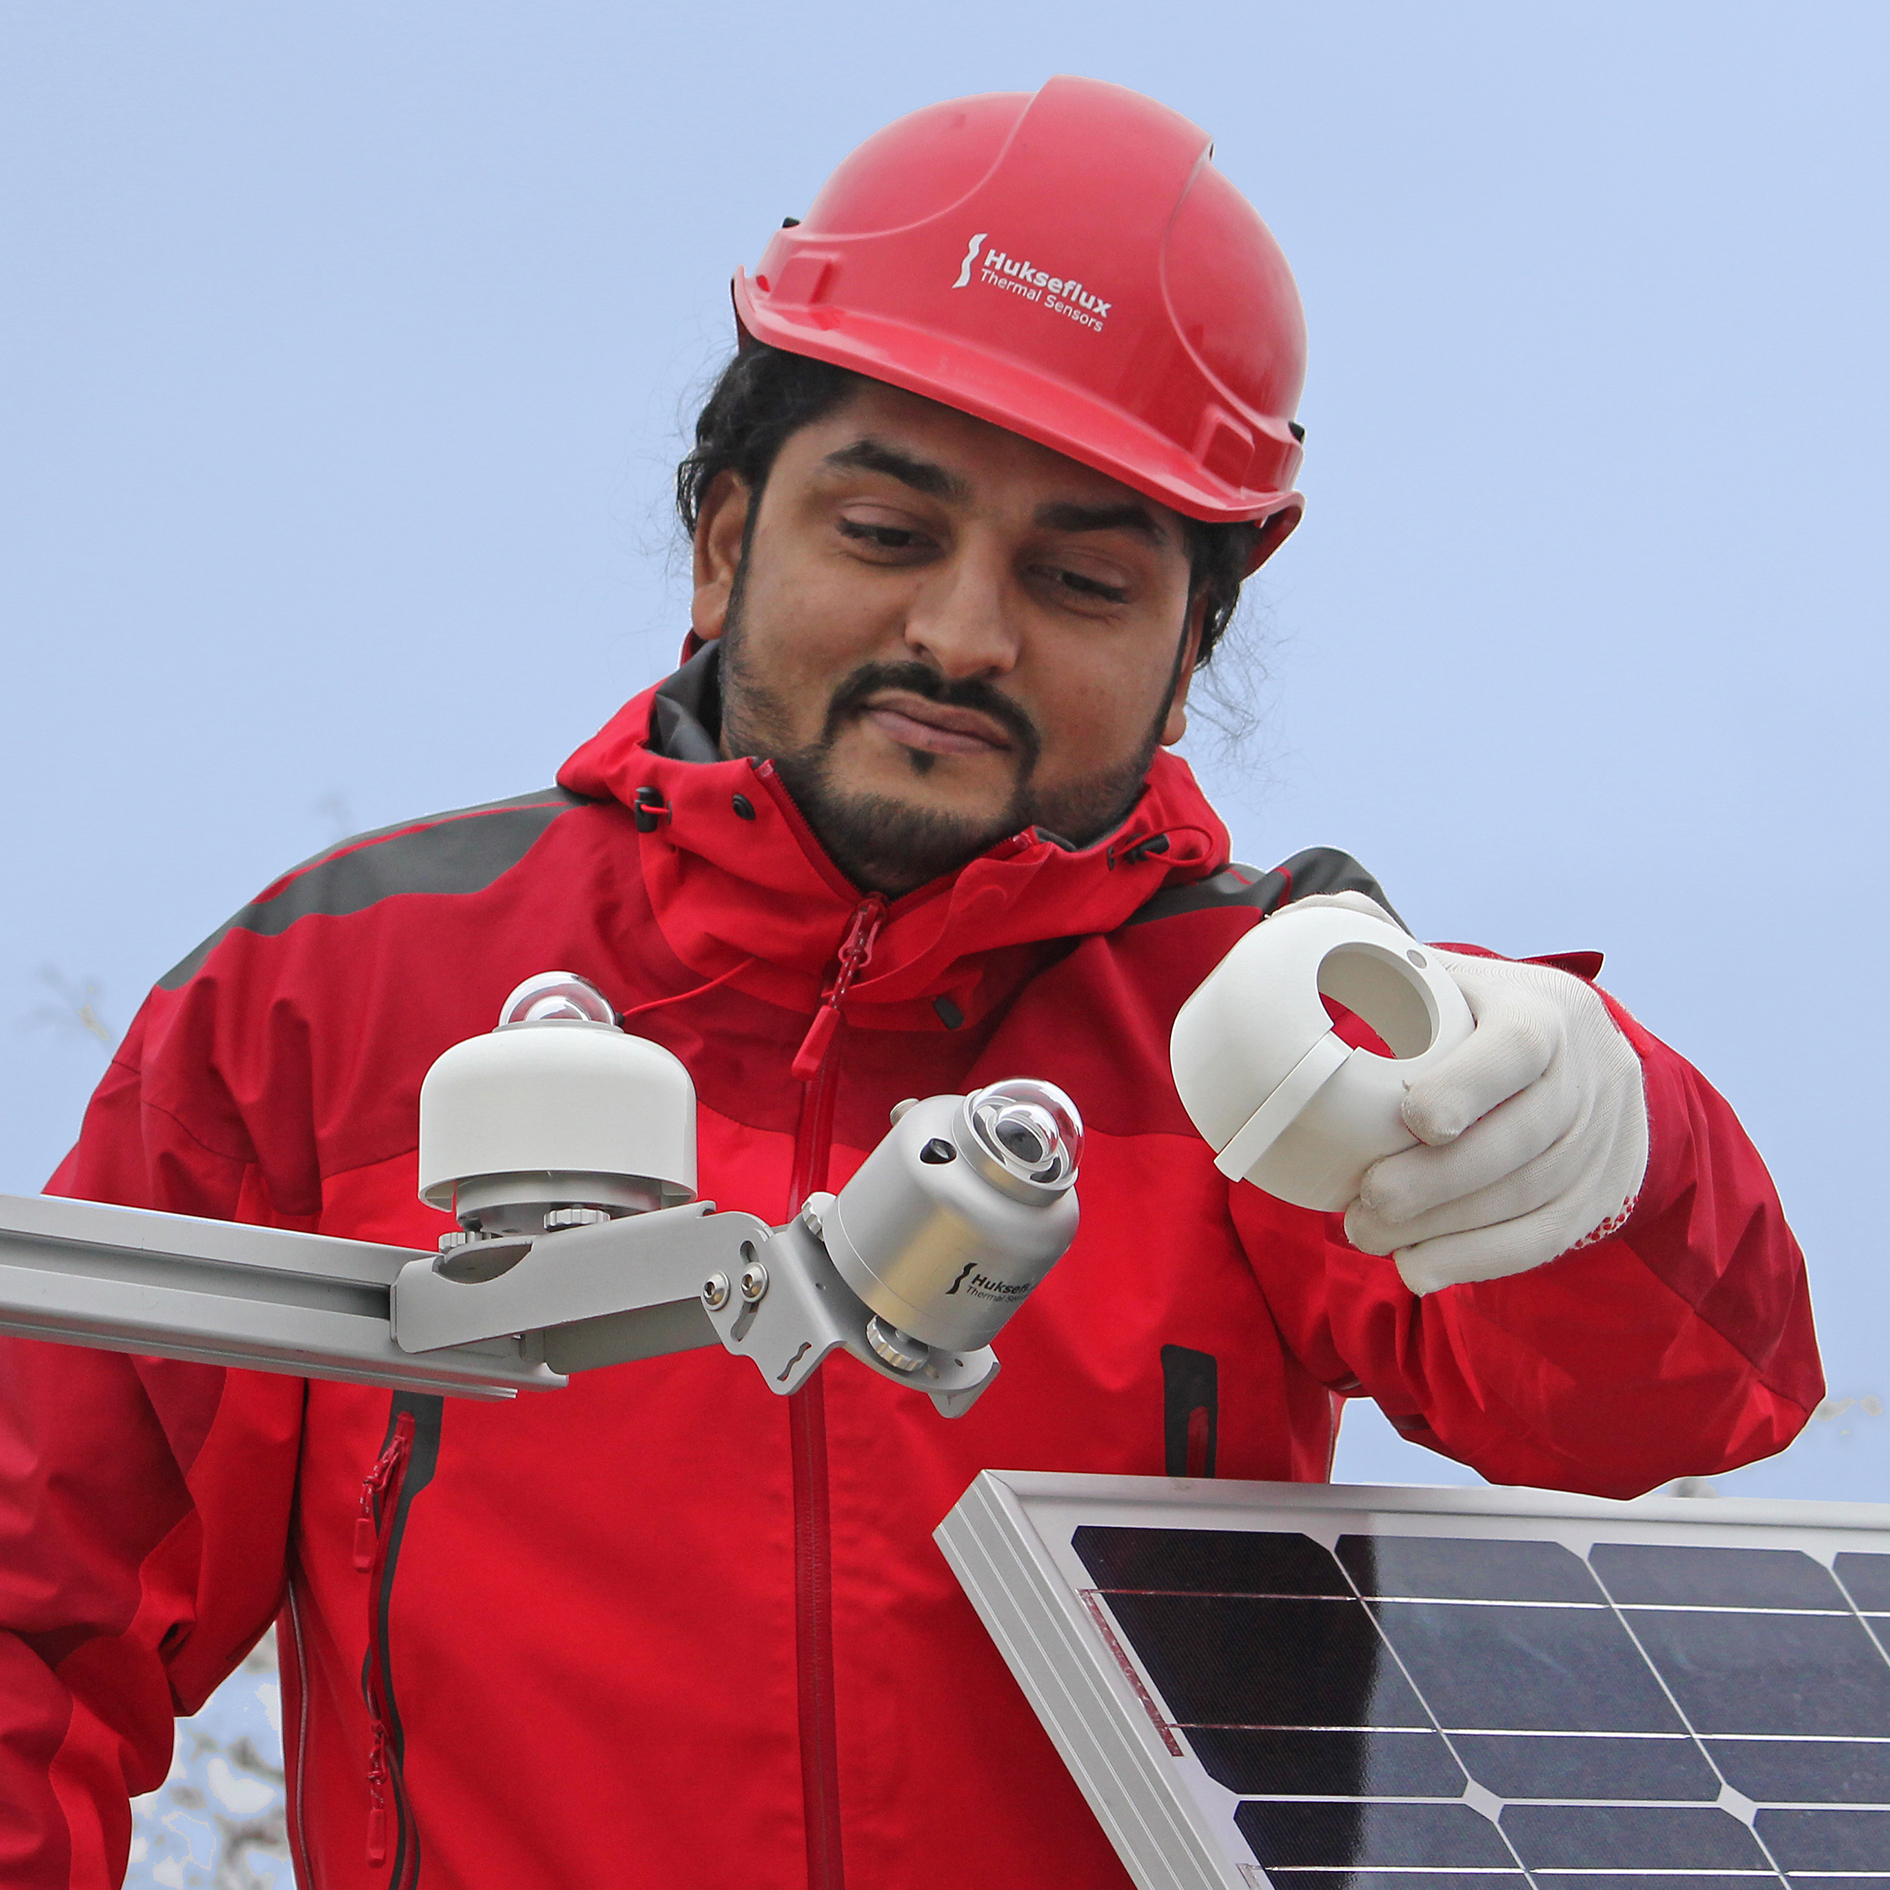
Install your sensor
It is time to install your instrument, so that the instrument remains fixed and levelled in all conditions for years. A sensor that is not properly levelled or aligned will give wrong results.
Pyrheliometers are standardized on 38 mm tube diameters, to allow mounting on a solar tracker. Pyranometers and pyrgeometers have 2 x M5 threads for mounting from below, on either a 46 mm or a 65 mm pitch. Alternatively, all models have a single M6 thread in the centre.
Hukseflux provides dedicated levelling mounts to simplify mounting and levelling of instruments on flat surfaces and on tubes of different sizes.
Datalogger
Instruments with an analogue output, be it millivolts or amplified voltages or currents, need to be connected to a datalogger (a voltmeter). There are many dataloggers available, choose one with a good resolution in the low voltage range rated for your conditions of use. Quality is important; using an inaccurate datalogger will give you an inaccurate measurement, no matter how good your solar radiation sensor is.
Pyranometers, pyrheliometers and pyrgeometers with an output in millivolts work completely passively; they require no power supplies or batteries.
Program your datalogger to calculate the irradiance E in W/m² by dividing the instrument voltage output U in V by the sensitivity of the instrument S in V/(W/m²).
Store 1-minute averages of irradiance. It is considered good practice to also store the minimum and maximum values of irradiance within the one minute, together with the standard deviation. It is recommended to measure data every second (a 1 Hz sampling frequency), although measurements every 3 seconds are also acceptable for most applications.
To find radiant exposures H in J/m² or kWh, integrate your 1-minute averages. Depending on your application, calculate hourly totals, daily totals or daily mean irradiance by integrating over different time intervals dt.
Digital pyranometers and pyrheliometers have on-board analogue to digital conversion and can be connected directly to a computer or SCADA (Supervisory Control And Data Acquisition) system.
These instruments output irradiance directly, so there is no need to work with the sensitivity of the instrument any more. Note that the calculations of the radiant exposures need to be done on the computer side, pyranometers have no internal clock.
Modern digital pyranometers and pyrheliometers, like the SR30-D1 and DR30-D1, offer extra measurements such as tilt angle, internal humidity, heater current and fan speed. These remote diagnostics permit real-time status monitoring remotely.
Grounding
Properly grounding your instrument is important, especially when working near high voltage sources such as PV arrays. An instrument that is not properly grounded can give false readings, fail completely or become a safety hazard
Follow the instructions in the user manuals, and download our report on digital pyranometer grounding / safety.
Maintaining high quality data
Now that you have solar radiation data coming in, you need to make sure your data makes sense and take steps to ensure you maintain a high quality dataset.
The most important thing to do is to perform quality control on your data set. Compare your measurements with a simple clear sky model, like the Bird model: check whether your data is unreasonably high or unreasonably low and check whether the times of sunrise, sunset and solar noon match. You should aim to do this not just once, but continuously.
High quality measurement requires maintenance: frequent cleaning of instrument optics (windows and domes), visual inspection of instruments level and desiccant. A good measurement practice is to have your instrument recalibrated every two years.
|
|
|
|
|
|
|
|
Conclusion
This note explained how to measure solar radiation, the right way.
We explained the different solar radiation quantities, and how to choose the instrument that works best for you.
We gave pointers on how to carefully select a location, and install your sensor properly. Accuracy depends on the entire measurement chain, an accurate instrument deserves an accurate datalogger.
To keep your data reliable, set up a quality control and maintenance program.
Further reading
1. WMO (2017) WMP-No. 8 WMO guide to meteorological instruments and methods of observation (the CIMO Guide)
2. McArthur L.J.B. (2005) WMO/TD-No. 1274 Baseline Surface Radiation Network (BSRN). Operations Manual. Version 2.1
3. Sengupta et. al., (2017), Best Practices Handbook for the Collection and Use of Solar Resource Data for Solar Energy Applications: Second Edition, NREL/TP-5D00-68886
4. ISO (1990) ISO/TR 9901:1990 Solar energy -- Field pyranometers -- Recommended practice for use
5. ASTM G183 - 15 Standard Practice for Field Use of Pyranometers, Pyrheliometers and UV Radiometers
Read the full article here:
How to measure solar radiation - note (PDF)
View all solar radiation sensors.